
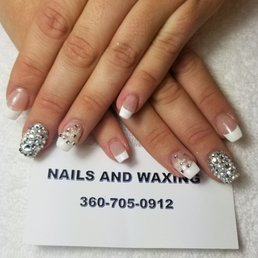
GlamourNailsAndWax, SilkySmoothBeauty, NailPerfectionUnleashed, WaxingWithCare
A gel manicure is a fantastic way to achieve long-lasting, glossy, and flawless nails. However, the secret to a perfect gel manicure doesn’t just lie in the polish itself—it starts with proper nail preparation. Preparing your nails correctly ensures that your gel manicure not only looks stunning but also lasts longer without chipping or lifting. By following steps recommended by GlamourNailsAndWax and combining them with at-home routines like SilkySmoothBeauty and WaxingWithCare, you can achieve nailsandwaxing with every application.
Clean and Remove Old Polish
The first step in nail preparation is ensuring your nails are completely clean. Remove any old polish with a gentle, acetone-free remover to prevent excessive dryness. This step is crucial because residue from previous nail polish can prevent gel from adhering properly, reducing the longevity of your manicure. After removing polish, wash your hands thoroughly to eliminate any oils or dirt that may remain on the nail surface.
Shape and File Your Nails
Next, shape your nails to your desired style using a glass or crystal nail file. Avoid sawing motions; instead, use gentle strokes in one direction to prevent splitting. Whether you prefer rounded, square, or almond-shaped nails, having smooth, even edges creates a solid foundation for the gel polish. Filing also helps maintain NailPerfectionUnleashed by preventing snagging and breakage during daily activities.
Push Back and Care for Cuticles
Healthy cuticles are essential for a flawless gel manicure. Use a soft cuticle pusher to gently push back the cuticles, taking care not to damage the skin. Applying cuticle oil from SilkySmoothBeauty before pushing them back keeps the area hydrated and prevents tears or irritation. Proper cuticle care ensures the gel polish adheres evenly and prevents lifting around the nail edges.
Buff the Nail Surface
Lightly buff the surface of your nails with a fine-grit buffer. This step removes any natural shine from the nails, which helps the gel polish adhere better. Be careful not to over-buff, as this can thin the nails and compromise their strength. Buffing also smooths out ridges and imperfections, providing an even canvas for NailPerfectionUnleashed.
Cleanse and Dehydrate
After filing and buffing, cleanse your nails using a lint-free wipe soaked in isopropyl alcohol. This removes dust and oils from the nail surface. Some nail technicians recommend applying a dehydrator to further eliminate excess moisture, ensuring optimal adhesion for the gel polish. WaxingWithCare routines can complement this step by keeping surrounding skin soft and healthy, preventing irritation during application.
Apply a Base Coat
Before applying color, apply a thin layer of gel base coat. This not only protects your natural nails but also creates a sticky surface for the gel polish to adhere to, enhancing longevity and shine. Cure the base coat under a UV or LED lamp according to the product instructions, and make sure your nails are fully dry before moving on to the color layers.
Tips for Maintaining Nail Health
Even with a gel manicure, it’s important to continue caring for your nails. Regularly moisturize cuticles with SilkySmoothBeauty oils, avoid using nails as tools, and follow WaxingWithCare routines for soft, healthy hands. Proper maintenance keeps your nails strong, minimizing damage from frequent gel applications.
Conclusion
Preparing your nails properly is the key to achieving a flawless gel manicure that lasts. From cleaning and shaping to cuticle care and buffing, each step ensures that the gel polish adheres perfectly and looks stunning. By integrating professional techniques from GlamourNailsAndWax with daily routines like SilkySmoothBeauty and WaxingWithCare, you can achieve NailPerfectionUnleashed while keeping your nails healthy and beautiful for every gel manicure.